Monday, September 14, 2009

Potato Gratin with Fresh Herbs

When you find purple potatoes . . . drench them in herb-infused cream? Yep! Unless you're on a diet, it's a great idea! My first experience with this dish was last Thanksgiving, and when I found "all blue" potatoes at the Green City Market in Chicago, I knew I was going to drag them home just for this recipe. Serious comfort food . . .
4 pounds mixed baby potatoes, such as Red Bliss, Peruvian Purples, and Fingerlings
2 cups heavy cream, plus some to cover
4 tablespoons butter (1/2 stick)
2 sprigs each fresh thyme, sage, and rosemary
2 garlic cloves, peeled and halved
Salt and pepper
1/2 cup grated Parmesan

Directions

Preheat the oven to 400 degrees F.

Halve the potatoes and toss them into a large baking dish and season with salt and pepper.

Meanwhile, put the cream, butter, herbs, and garlic in a small saucepan and bring to a simmer over medium heat. Cook for about 5 minutes, to infuse the cream with flavor. Season with salt and pepper.

Pour the hot cream mixture over the potatoes; if there is not enough cream to go 3/4 of the way up the potatoes then pour some additional cream on top to make up the difference. Sprinkle the Parmesan evenly over the top. Bake for 30 to 35 minutes, until the potatoes are cooked through and top begins to brown. Top with additional fresh thyme and serve with additional fresh rosemary as a garnish. Serve immediately, or cover and keep warm until ready to serve.
- Recipe adapted from Rachael Ray, via FoodNetwork.com

Tomatoes & Salsa

I lost access to my blog for a little while . . . so I'm way behind on posts! Here are a few photos from my own personal tomato festival:

My first batch of salsa . . . I had never canned anything before and was pretty nervous that I might end up with tomato splattered all over the kitchen. It seemed like a lot of work for the amount of salsa I ended up with, but things actually went smoothly - thanks entirely to my friend Amanda, who was kind enough to chop tomatoes with me all afternoon and walk me through the canning process!

Thursday, August 27, 2009

White Pizza with Arugula

As much as I love to cook, I have to admit that yeast breads are not always my favorite project. Sometimes it seems like they require too much patience and planning, which can be difficult given the fast pace of life. This pizza dough, however, is one of the easier yeast bread recipes I have used - and the result is absolutely worth the effort!
Unless this is your first time reading my blog, you know that my husband is a meat & potatoes guy - and you can guess what his response is to a white pizza with arugula . . . and no meat! Despite the lack of meat, he gave the recipe his endorsement - "This pizza is really good, even without meat! The crust has a good flavor." (Husb tried it without the arugula)

Thanks to Andrea for selecting such a DELICIOUS recipe for Barefoot Bloggers!

White Pizza with Arugula

For the dough:
1 1/4 cups warm (100 to 110) water
2 packages dry yeast
1 tablespoon honey
Good olive oil
4 cups all-purpose flour, plus extra for kneading
Kosher salt
4 cloves garlic, sliced
5 sprigs fresh thyme
1/4 teaspoon crushed red pepper flakes

For the topping:
3 cups grated Italian fontina cheese (8 oz.) I used Raclette cheese because I had it on hand
1 1/2 cups grated fresh mozzarella cheese (7 oz.) OR one 8 oz. pkg fresh mozzarella pearls (not grated)
11 ounces creamy goat cheese, such as montrachet, crumbled

For the vinaigrette:
1/2 cup good olive oil
1/4 cup freshly squeezed lemon juice
Freshly ground black pepper
8 ounces baby arugula
1 lemon, sliced

freshly grated Parmesan cheese

Directions

Mix the dough - Combine the water, yeast, honey and 3 tablespoons of olive oil in the bowl of an electric mixer fitted with a dough hook. When the yeast is dissolved, add 3 cups of flour, then 2 teaspoons salt, and mix on medium-low speed. While mixing, add up to 1 more cup of flour, or just enough to make a soft dough. Knead the dough for about 10 minutes until smooth, sprinkling it with the flour as necessary to keep it from sticking to the bowl.

Knead by hand - When the dough is ready, turn it out onto a floured board and knead it by hand a dozen times. It should be smooth and elastic.

Let it rise - Place the dough in a well-oiled bowl and turn it to cover it lightly with oil. Cover the bowl with a kitchen towel and allow the dough to rise at room temperature for 30 minutes.

Make garlic oil - Place 1/2 cup of olive oil, the garlic, thyme and red pepper flakes in a small saucepan and bring to a simmer over low heat. Cook for 10 minutes, making sure the garlic doesn't burn. Set aside.

Preheat the oven to 500 degrees. (Be sure your oven is clean!)

Portion the dough - Dump the dough onto a board and divide it into 6 equal pieces. Place the doughs on sheet pans lined with parchment paper and cover them with a damp towel. Allow the dough to rest for 10 minutes. Use immediately, or refrigerate for up to 4 hours.

Stretch the dough - Press and stretch each ball into an 8-inch circle and place 2 circles on each sheet pan lined with parchment paper. (If you've chilled the dough, take it out of the refrigerator approximately 30 minutes ahead to let it come to room temperature.)

Top the dough - Brush the pizzas with the garlic oil, and sprinkle each one liberally with salt and pepper. Sprinkle the pizzas evenly with fontina, mozzarella and goat cheese. Drizzle each pizza with 1 tablespoon more of the garlic oil and bake for 10 to 15 minutes, until the crusts are crisp and the cheeses begin to brown. Top each pizza with a sprinkling of freshly grated Parmesan.

Make the vinaigrette - Meanwhile, whisk together 1/2 cup of olive oil, the lemon juice, 1 teaspoon salt and 1/2 teaspoon pepper.

Add the greens - When the pizzas are done, place the arugula in a large bowl and toss with just enough lemon vinaigrette to moisten. Place a large bunch of arugula on each pizza; add a slice of lemon and freshly grated Parmesan and serve immediately.
- Adapted (ever so slightly!) from the Barefoot Contessa, via FoodNetwork.com

Tuesday, August 25, 2009

Vanilla-Orange Cream Popsicles


I promise I make more than popsicles and ice cream . . . the real food just isn't as fun to blog about, I guess. Eating Well magazine had a small section featuring homemade "freezer pop" recipes in their July/August 2009 issue; so far I have tried 2 of the 5 pops and they have both turned out to be tasty and refreshing summer treats! I have had so much fun making freezer pops that I even bought a really cool set of silicone popsicle molds (see the swirl-cone effect?).

Vanilla-Orange Cream Pops (aka Orange Julius on a Stick)
1 1/2 cups orange juice
1 1/2 cups low fat vanilla yogurt
1-2 tbsp. sugar
1/2 tsp. vanilla extract

Whisk all ingredients together in a medium bowl; divide mixture among freezer pop molds and freeze until completely firm, about 6 hours. Briefly run warm water over molds to release popsicles. Makes ten 3-oz. servings.

Per serving: 53 calories, 1 g fat, 2 mg cholesterol, 10 g carb, 2 g protein, 0 g fiber. 32% daily value of Vitamin C.
- Recipe and nutrition facts from Eating Well magazine

Sunday, August 23, 2009

This might possibly be . . .

The best ice cream EVER.
Yes, it is a bold statement . . . but I believe it to be true. I saw this recipe a year ago, on the blog of the very talented Emiline. It has been on my 101 list since then, and the combination of company last weekend and fresh peaches finally pushed it up on the priority list. This may not make sense, but it is so good that I both a) wish I had made it last summer and b) wish I had never made it at all. Why? Because all ice cream I make will now be compared to this, and honestly, I can't imagine what would top it. The flavors balance perfectly - it is sweet, tart, creamy, and occasionally crunchy and salty (when you get a walnut) all at once.

Buttermilk Frozen Custard with Bourbon Brandy Roasted Peaches and Brown Sugar Walnuts (Original recipe by Emiline; slightly adapted version below)

1 1/2 cups buttermilk
6 large egg yolks
3 cups heavy cream or half-and-half (I used 1.5 cups of each)
1 cup granulated sugar
1 1/2 teaspoons vanilla extract
2 tablespoons unsalted butter, divided use
6 tablespoons brown sugar, divided use
1/4 teaspoon salt
1/2 cup finely chopped walnuts
1 cup coarsely chopped firm ripe peaches, peeled
2 tablespoons Brandy

Whisk together buttermilk and egg yolks in a large mixing bowl.

Whisk together cream and sugar, in a large saucepan, over medium heat, and bring mixture to a boil. Gradually whisk half of the hot cream into eggs, until well combined. Whisk egg mixture back into saucepan containing remaining cream. Heat mixture, whisking constantly, until custard coats the back of a spoon.

Strain custard into a large mixing bowl, and whisk in vanilla.
Cool custard for 30 minutes; lightly cover and refrigerate overnight.

To make the brown sugar walnuts, melt 1 tablespoon butter in a large nonstick skillet, over medium heat. Stir in 3 tablespoons brown sugar, salt and walnuts, and cook for 5 minutes, stirring constantly, until sugar is dissolved, and walnuts are golden and fragrant. Pour into a small bowl and cool completely.

To make the peaches, melt the additional 1 tablespoon butter in a large nonstick skillet, over medium heat. Stir in the additional 3 tablespoons brown sugar and stir until dissolved. Add peaches and Bourbon, and cook for 3 minutes, stirring frequently, until tender and syrupy. Pour into a small bowl and cool completely.

Pour custard into ice cream maker and process according to manufacturer's directions. In the last 5 minutes of processing, add walnuts and peaches, and allow to finish churning. Pour into a freezer-proof container and freeze for 2 hours, or until ready to serve.

Yield: 8 servings
Source: Visions of Sugar Plum, by Emiline - check it out, she has amazing treat recipes!

Sunday, August 16, 2009

Mocha Ice Pops

One of my favorite beverages is an iced mocha, so I was thrilled to find a simple recipe for Mocha Ice Pops in the July/Aug. issue of Eating Well. The recipe takes only a few minutes to prepare and the result is a low calorie, cold and refreshing treat . . . it is definitely more icy than creamy, and somehow manages to taste both light and rich. Highly recommended for coffee/mocha fans!

Mocha Ice Pops
2 1/2 cups hot brewed coffee
5 tbsp. sugar
2 tbsp. unsweetened cocoa powder
1 cup half-and-half
1/4 tsp. vanilla extract
pinch of salt

Whisk together coffee, sugar, and cocoa in a medium bowl until sugar has dissolved. Stir in half-and-half, vanilla and salt until combined.

Divide mixture among freezer-pop molds, insert sticks and freeze until completely firm, about 6 hours. Run mold under hot water briefly to remove ice pops from mold.

Makes 10 three-ounce popsicles. Per serving: 54 calories, 3 g fat, 9 mg cholesterol, 7 g carb, 1 g protein, 0 g fiber.
- Recipe from Eating Well magazine

Thursday, August 13, 2009

Banana Mango Daiquiris

For the first August Barefoot Bloggers recipe, Veronica chose Banana Mango Daiquiris. I halved the recipe below, because even though we probably could have consumed the whole recipe, it would not have been a good idea! If you use frozen mango and have a little bit left over, this recipe also makes a good smoothie when you leave out the rum. Strawberries are also a good addition, if you have some (fresh or frozen) you need to use.

Banana Mango Daiquiris

2 cups chopped ripe (or frozen) mango
1 ripe banana, chopped
1/2 cup fresh squeezed lime juice (4 limes)
1/4 cup sugar syrup*
1 1/4 cups dark rum
Mango slices, for serving

Place the mango, banana, lime juice, sugar syrup, and rum in a blender and process until smooth. Add 2 cups of ice and process again until smooth and thick. Serve ice-cold in highball glasses with the mango slices.

*To make simple syrup, heat 1 cup sugar and 1 cup water in a small saucepan until the sugar dissolves. Chill.
- Recipe from Ina Garten

Wednesday, August 12, 2009

Sunday, August 09, 2009

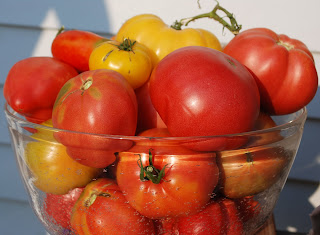
Tomatoes

A little sample of the heirloom tomatoes from my garden . . .Beautiful and tasty . . .
I've got to start making salsa . . . or something!

Saturday, August 08, 2009

Mojito ice cream

A mojito isn't something I drink often, but while I was dreaming up ice cream flavors and trying to find a way to use some of the lime mint in my garden, it occurred to me that mojito ice cream might be a nice summer treat. I wasn't able to find a recipe so I used a basic ice cream formula and added mint, lime and rum. To be honest, the results have been mixed. My friend A. liked the ice cream, while B. wasn't crazy about it until she added chocolate sauce and whipped cream. Another A. also liked it, but L. wasn't so sure about it. (hmm . . . I see a trend here - if your name starts with "A" you will like this ice cream . . .). My opinion? Loved it! I think it is very refreshing, and the flavors of the mint and lime really shine through. The rum also keeps it from freezing too hard, which homemade ice cream sometimes does. If you're up for an adventure and are a fan of fresh mint, you should definitely give this ice cream a try!

Mojito ice cream
1 cup whole milk
3/4 cup sugar
2 cups heavy cream
1 cup fresh lime mint leaves
4 large egg yolks
Pinch of salt
2 tbsp. lime zest
2 tbsp. fresh-squeezed lime juice
3 tbsp. rum

1. Warm the milk, sugar, and 1 cup of the cream in a small saucepan over medium-low heat. Add the mint leaves. Cover, remove from the heat, and let steep at room temperature for 30 minutes to 1 hour.

2. Strain the mint-infused mixture through a mesh strainer into a medium saucepan. Pour the remaining 1 cup (250 ml) heavy cream into a large bowl and set the strainer on top.

3. Re-warm the mint-infused mixture. In a separate medium bowl, whisk together the egg yolks and salt. Slowly pour the warm mint liquid into the egg yolks, whisking constantly, then scrape the warmed egg yolks back into the saucepan.

4. Stir the mixture constantly over medium heat with a heatproof spatula, scraping the bottom as you stir, until the mixture thickens and coats the spatula. Pour the custard through the strainer and stir it into the cream. Stir until cool over an ice bath. Stir in lime zest, lime juice, and rum.

5. Chill the mixture thoroughly in the refrigerator; then freeze in ice cream maker according to instructions. Transfer to a freezer-proof container and freeze at least 4-6 hours before serving.

Friday, July 31, 2009

Peach Crumble

It's a good thing there are plenty of ripe peaches for sale, because for the second July Barefoot Bloggers recipe Aggie chose Peach & Blueberry Crumbles, from The Barefoot Contessa at Home. As you can tell, I left out the blueberries. Great recipe - thanks, Aggie!
(pictures coming soon)


Peach Crumble


For the Fruit:
2 lbs firm, ripe peaches (6-8 peaches)
2 tsp grated lemon zest
2 tbsp freshly squeezed lemon juice
1/2 cup granulated sugar
1/4 cup all-purpose flour
1 cup fresh blueberries (1/2 pint)

For the Crumble:
1 cup all-purpose flour
1/2 cup granulated sugar
1/4 cup light brown sugar, lightly packed
1/2 tsp kosher salt
1/4 tsp ground cinnamon
1/4 lb (1 stick) cold unsalted butter, diced

1. Preheat the oven to 350 degrees.

2. Peel peaches with piranha peeler - or if you don't have one:
Immerse the peaches in boiling water for 30 seconds to 1 minute, until their skins peel off easily. Place them immediately in cold water. Peel.
3. Slice peeled peaches into thick wedges, and place them in a large bowl. Add the lemon zest, lemon juice, granulated sugar, and flour. Toss well. Gently mix in the blueberries. Allow the mixture to sit for 5 minutes. Spoon the mixture into ramekins or custard cups.

4. For the topping, combine the flour, granulated sugar, brown sugar, salt, cinnamon, and the butter in the bowl of an electric mixer fitted with a paddle attachment. Mix on low speed until the butter is the size of peas. Rub the mixture with your fingertips until it’s in big crumbles, then sprinkle evenly over the fruit. Place the ramekins on a sheet pan lined with parchment paper and bake for 40-45 minutes, until the tops are browned and crisp and the juices are bubbly. Serve warm or at room temperature. If you want to make these early, store the unbaked crumbles int he refrigerator and bake before dinner. Serves 5 to 6.

Thursday, July 30, 2009

Pasta with Sun-Dried Tomatoes

July's first Barefoot Bloggers recipe is Pasta with Sun-Dried Tomatoes (although I think that is a bad title, because it is really so much more!), chosen by Cat of Delta Whiskey. Check out Cat's blog - not only is she a fellow Barefoot Contessa fan & cook, she's also a proud military wife - so inspiring (and she shares my birthday!). While you're there, tell her she picked out a GREAT recipe - loved this with fresh Cherokee Purple tomatoes from my garden!

Pasta with Sun-Dried Tomatoes

1/2 pound fusilli (spirals) pasta (I used brown rice pasta)
Kosher salt
Olive oil
1 pound ripe tomatoes, medium-diced
3/4 cup good black olives, such as kalamata, pitted and diced
1 pound fresh mozzarella, medium-diced
6 sun-dried tomatoes in oil, drained and chopped

For the dressing:
5 sun-dried tomatoes in oil, drained
2 tablespoons red wine vinegar
6 tablespoons good olive oil
1 garlic clove, diced
1 teaspoon capers, drained
2 teaspoons kosher salt
3/4 teaspoon freshly ground black pepper
1 cup freshly grated Parmesan
1 cup packed basil leaves, julienned

Cook the pasta in a large pot of boiling salted water with a splash of oil to keep it from sticking together. Boil for 12 minutes, or according to the directions on the package. Drain well and allow to cool. Place the pasta in a bowl and add the tomatoes, olives, mozzarella, and chopped sun-dried tomatoes.

For the dressing, combine the sun-dried tomatoes, vinegar, olive oil, garlic, capers, salt, and pepper in a food processor until almost smooth.

Pour the dressing over the pasta, sprinkle with the Parmesan and basil, and toss well.

Wednesday, July 08, 2009

Banana Ice Cream

A couple weeks ago, bananas were on sale at our local grocery store, and I did what any banana loving person would do . . . bought not two or three - but four bunches. We ate bananas for breakfast and snacks, made two batches of banana bread to freeze and still had one bunch leftover. I also had cream left from making ice cream. Luckily, I stumbled across a recipe for banana ice cream that called for very (very, very!) ripe bananas and cream - and best of all, did not require cooking. Perfect!

The ice cream tastes exactly as you would expect it to - like bananas and cream. It has an unmistakable banana flavor - but when combined with toppings (like chocolate sauce and toffee peanuts) it's not overwhelming. To be absolutely honest, I'm not going to sneaking little bites of this ice cream from the freezer . . . but I think if a few more "banana split" toppings were added it would make a wonderful summer treat!

Banana Ice Cream
2 cups pureed very ripe bananas (4 medium)
1 cup heavy cream
3 tbsp. sugar
1 tsp. vanilla extract
1/8 tsp. salt

Stir together banana puree, cream, sugar, vanilla and salt. Let stand for a few minutes; stir again to make sure sugar has dissolved. Chill mixture for 30 minutes. Freeze according to instructions for your ice cream machine. Transfer to an airtight, freezer proof container and freeze until ice cream is hard enough to scoop.
- Recipe adapted from Pure Dessert by Alice Medrich

Tuesday, July 07, 2009

Coming Soon

A little preview of what I'm working on for Kenzie's Kitchen:
Chocolate cinnamon cake, rum cake, and rustic shortbread tart

Garden Chicken Salad

Potato Salad

Easy Grilled Chicken & Zucchini

Roasted Vegetable Fettuccine

PLUS
Mojito Ice Cream
Banana Ice Cream

Saturday, June 27, 2009

Garden Burger


I'm not sure if this was the best burger I have ever had . . . but it was definitely the best burger I have ever had at home! The texture of the burger was perfect (Ken did a great job grilling), and the toppings were full of flavor. It's that time of year where I'm constantly looking for ways to incorporate zucchini into our meals, so I decided to put some on top of my burger. I also had some really great Thai Basil Jack cheese from the farmers market . . . zucchini, basil . . . one topping led to another and I ended up with a garden burger.

Instructions:

Burger - 1 pkg. of ground beef (from our freezer; about 1 lb.) plus 1 egg, approximately 1/4 cup panko bread crumbs, sea salt and freshly ground black pepper. Mix well and shape into patties. Make an indention in the center so patty is thicker on edges than in the middle (kind of like a doughnut but don't actually make a hole). Grill. Add cheese during last 1-2 minutes of grilling.

While burgers are grilling, saute zucchini in olive oil with salt and pepper. Remove zucchini to plate, add more olive oil and saute Swiss chard and finely chopped garlic in same skillet (1 to 2 minutes, just enough to wilt Swiss chard). Slice red pepper and cucumber. Toast bun.

To assemble: Bun - top with wilted Swiss chard - place burger on top of Swiss chard - place zucchini on top of burger - top with red pepper and cucumbers.

I considered adding guacamole, but ultimately decided against it because I was afraid its flavor would be overwhelming. Mayonnaise with fresh herbs might be a good addition - although this burger really did not need any extra moisture. I think I'm ready for a burger throwdown with Bobby Flay!